Adding an ENTRA ID Enterprise Application in TelluCare
This guide describes how to add an ENTRA ID enterprise application in TelluCare for the combination of Azure SSO and Provisioning. This is a self-service task but need to be activated by Tellu to be available on the “Account settings” page
1. Creating an Enterprise Application in ENTRA
1. Navigate to Enterprise Applications: Go to the ENTRA ID portal, navigate to "Enterprise applications," and click on "New application."
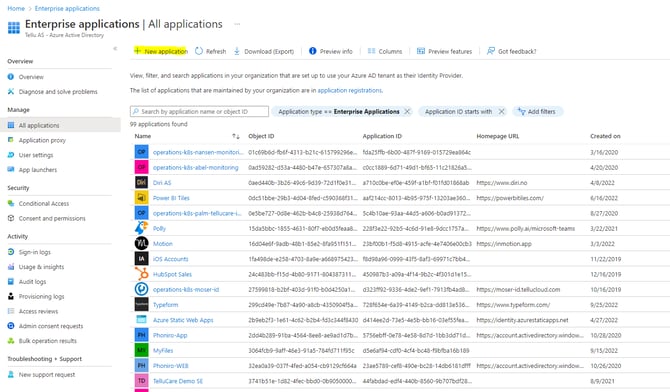
2.Create Your Own Application: Click on "Create your own application" and input a suitable name for this application. The name can be changed later.
3. Add User.Read Permission: To enable user login via ENTRA ID SSO, you need to add the User.Read permission:
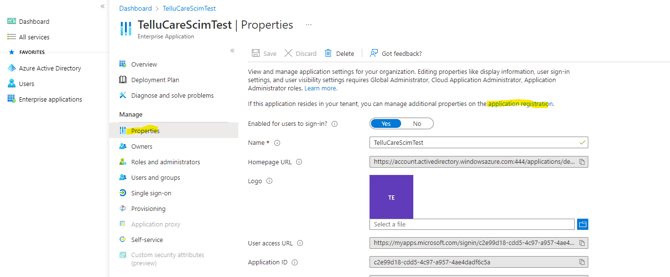
Then, go to "Application registration," "API Properties," and "Add a permission."

4. Add a Secret:
To enable TelluCare SSO, you need to add a client secret:
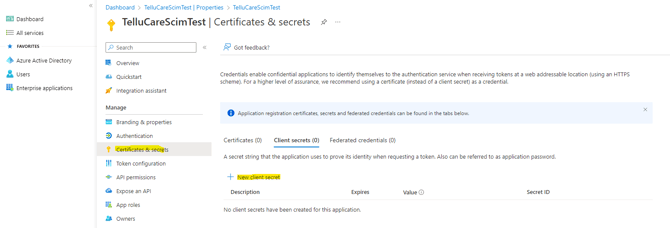
- Click on "Certificates & secrets" and "New client secret."
- Input a suitable name for the secret and select an expiration time.
- Store the "Value," as it will be entered in TelluCare and is not accessible later.
When the secret expires, create a new one and enter its "Value" in TelluCare.
5. Fetch Application and Directory ID: Click on "Overview" to obtain the Application and Directory ID.Click on “Overview” to fetch Application and Directory ID.

2. Configuring TelluCare for SSO
-
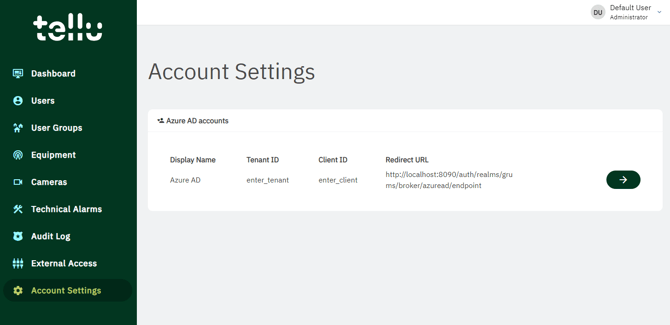
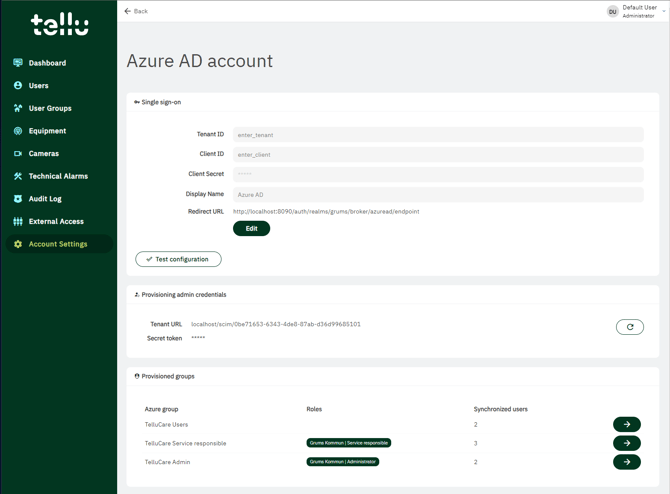
Enter Application Details: The secret, along with the Application and Directory ID, should be entered in TelluCare to enable SSO:
- Click "Account Settings" in the left menu (you need to be an Administrator or Tellu Support at the top level).
- Click the arrow to edit the Azure account.
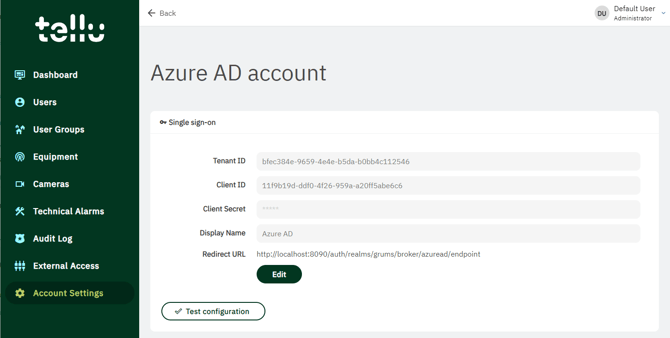
3. Add Redirect URL in ENTRA ID:
- Click "Authentication," "Add a platform," and then "Web."

Add the Redirect URL generated in TelluCare.

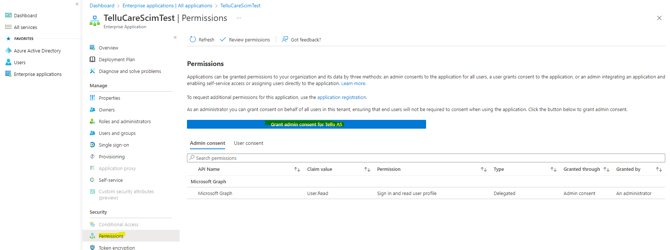
4. Admin Consent: Admin consent is needed. Navigate back to the Enterprise application, click on "Permissions" under the Security pane, and "Grant admin consent for …."
3. Activating Provisioning for user synchronization
-
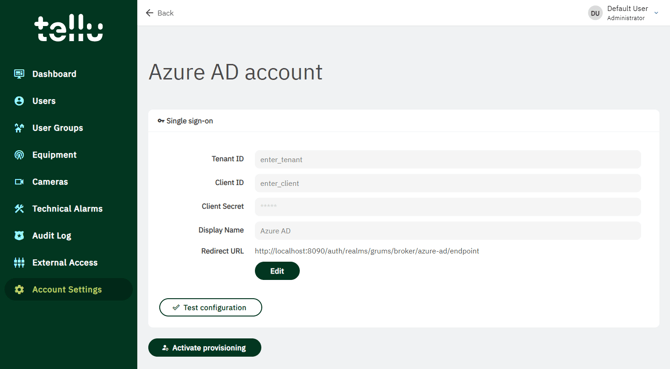
Activate provisioning in TelluCare:
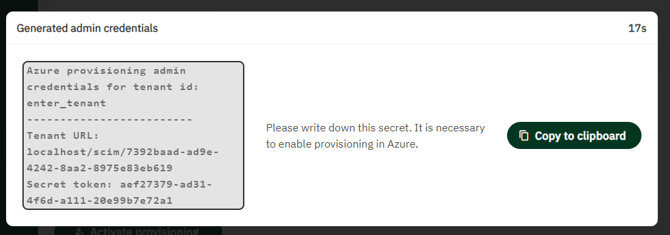
- Open Account settings and then Click “Activate provisioning” and store the secret token that is generated.
2. Activate provisioning in ENTRA:
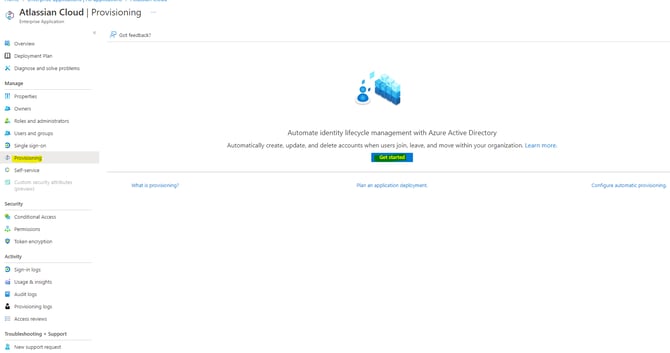
- Click on "Provisioning" and "Get started."
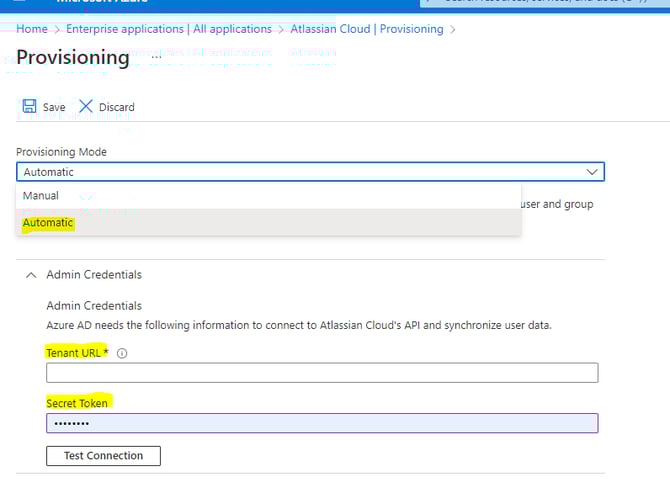
- Select "Automatic" as the provisioning mode.
- Enter the Tenant URL and Secret Token from the previous step.
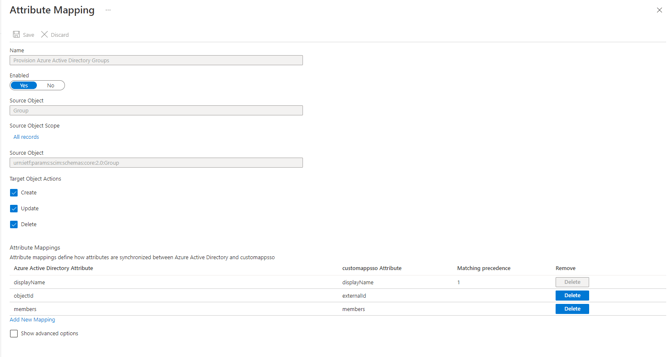
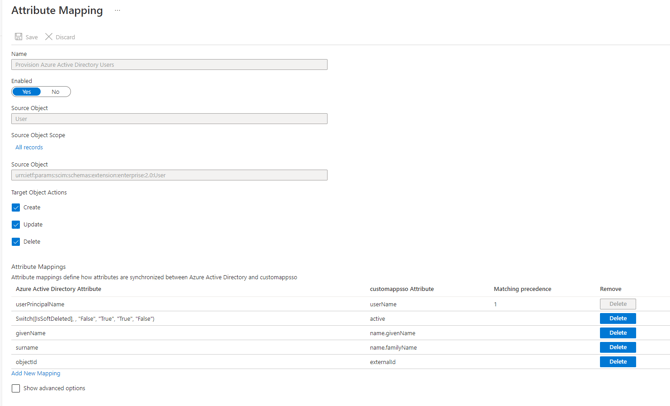
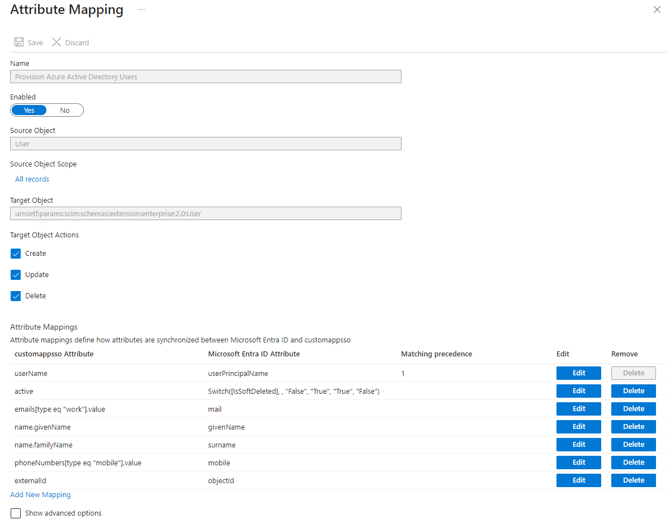
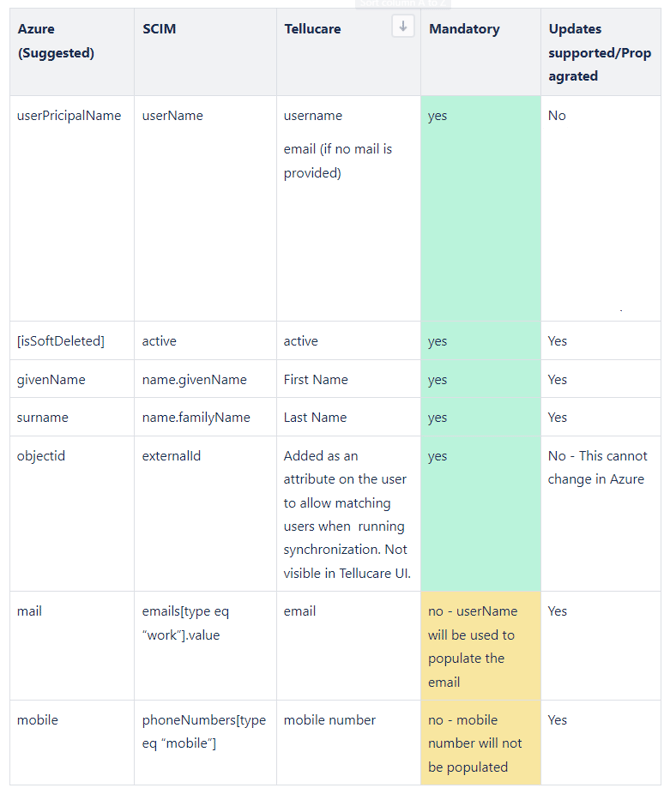
3.Enable Groups and Users: Both groups and users should be enabled with "Attribute mapping" set appropriately.
4. Provisioning
Users and groups
Provisioning in TelluCare relies on both users and groups to function correctly. The group configuration on the Tellucare side specifies roles (if configured) and enables SSO for synced users. This means that a user synced without a group will not have any roles assigned or SSO activated.
Conflict Management
When enabling Provisioning for users who already exist in Tellucare, the system attempts to resolve conflicts by comparing the existing user with the Provisioned user. A conflict is returned only if specific criteria are unmet.
Rules to Fulfill:
Username and Email Consistency
Both the username and email must match between the Provisioned user and the existing TelluCare user. Ensure attribute mapping is configured correctly to align sources for the username—commonly, userPrincipalName in Azure is used as the username.
Unique Provisioning Source
The user must not have been Provisioned by another service previously. Typically, the objectId from Azure is registered on the Tellucare user during Provisioning. If an objectId exists, it must match.
SSO Activation
The user must already have SSO activated. If all rules are met, Tellucare will allow Provisioning, updating any additional fields on the user profile to keep it synchronized with the source.
Groups
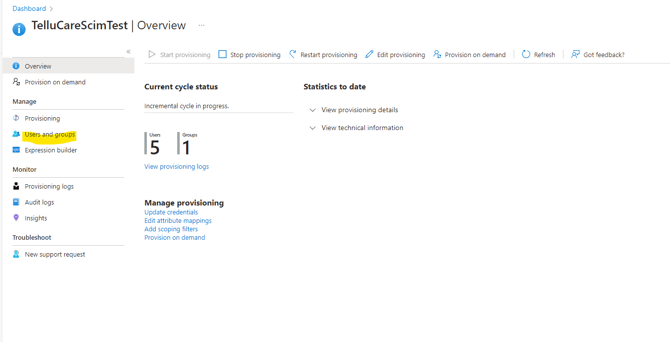
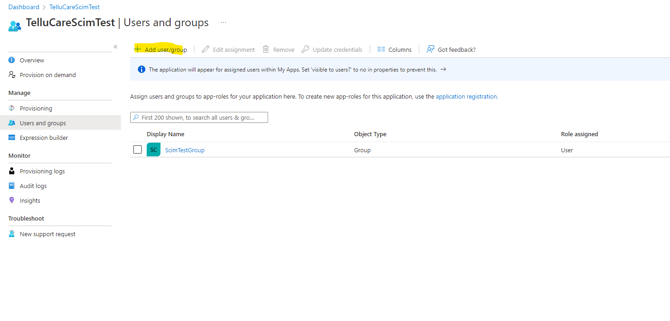
- After the first provisioning cycle, you can see provisioned groups and the number of users for each group in TelluCare.
- Assign TelluCare roles to the provisioned group to ensure all users within that group receive a certain role, or configure roles for users individually. New users will receive the configured role in future provisioning cycles if applicable.
By following these steps, you can efficiently and compliantly log events and manage user synchronization in TelluCare using ENTRA ID.